Savage Bolt Head Change Procedure
INTRODUCTION:
The use of a barrel locknut to set headspace by Savage makes the replacement of barrels by the hobbyist or mechanically inclined shooter simple. The Savage 110 family of rifles (110, 111, 112, 116, 10, 11, etc) can be rebarreled without the use of a lathe, or chamber reamers. It is possible to even change calibers as long as the case head sizes are the same. For example, if you have a 30/06 rifle you can easily rebarrel to a host of calibers from 22/250 to .35 Whelen, although some tweaking of the magazine may be required.
However, if you wish to change to a caliber with a different case head size, the easiest way to accomplish this is to change the bolt head to one of the correct case head size. The accompanying photographs show the change of a Magnum bolt head for a .223 Rem bolt head. (Note there are two types of push feed bolt heads - check here for more info.)
STEP 1: REMOVE STRIKER ASSEMBLY
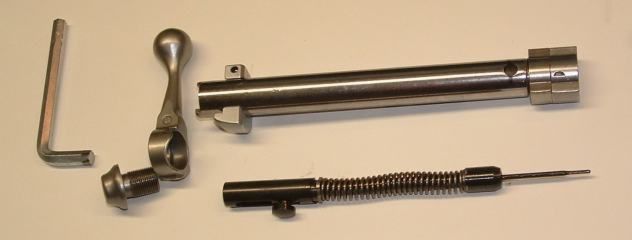
 The bolt shown above
has an Allen (Hex) type bolt assembly screw. Older models are provided with
a simple slot. Unsrew it all the way out. You may want to mark the bolt handled
and body to simplify reassembly.
The bolt shown above
has an Allen (Hex) type bolt assembly screw. Older models are provided with
a simple slot. Unsrew it all the way out. You may want to mark the bolt handled
and body to simplify reassembly.
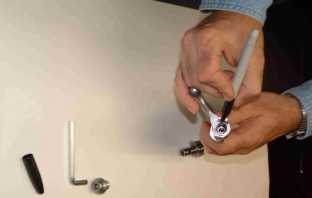
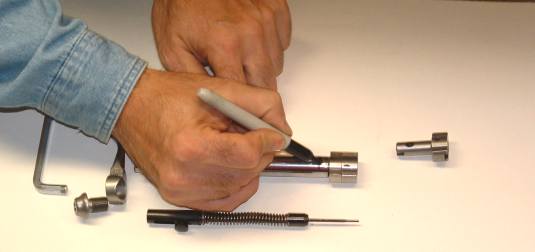
The cocking peice sleeve which retains the cocking peice pin can now either be removed (older models) or moved back so that the cocking peice pin can be removed from the striker assembly as shown below...
 With the pin removed,
the striker assembly can now just slide out.
With the pin removed,
the striker assembly can now just slide out.
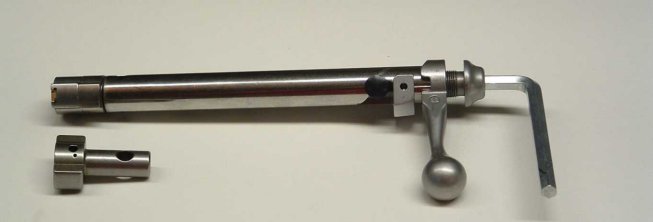
Here is the striker removed. The pin and sleeve have been put back on the striker so the parts don't get lost.....
 .
.
STEP 2: REMOVE BOLT HEAD PIN
 Mark
the position of the pin in the bolt by drawing a line with a permanent marker
on the bolt throug the pin.
Mark
the position of the pin in the bolt by drawing a line with a permanent marker
on the bolt throug the pin.
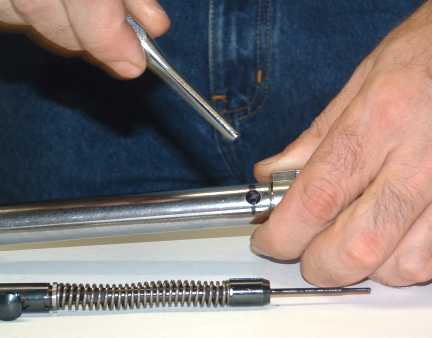
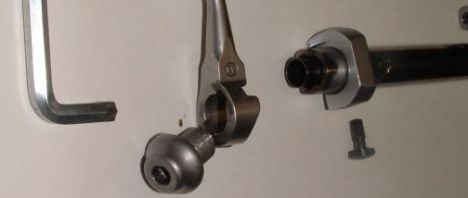
By pushing the bolt head in towards the bolt it should be possible to push the pin out of the bolt.
Here are the parts layed out along withthe new bolt head. Note the spring washer between the baffle and the bolt body. It provides spring tension on the bolt head to retain the bolt head pin when the striker assembly is removed.
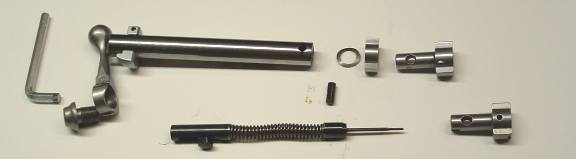
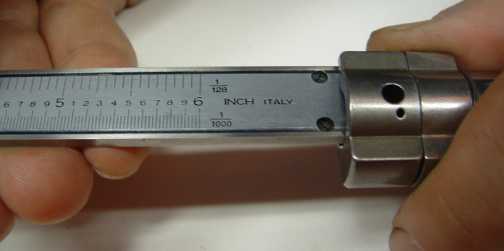
To reassemble replace with the new bolt head, push the bolt head towards the bolt body and insert the pin. It may be necessary to tap the pin in lightly. Make sure the pin lines up with the line you drew before so that the firing pin does not bind on the pin!! Before reassembling the bolt screw and handle (but with striker pin inserted) , check the firing pin protrusion (with the srtiker all the way down) with a caliper or micrometer. Protrusion should be ,052-.060 inch. Protrusion can be easily adjsted but requires dissambly of the striker assembly.